Why is Golden Teacher So Popular?
Most claims are anecdotal, but people believe golden teacher provides the smoothest trips when you use 3 or more grams of the drug. Many studies are being done at Johns Hopkins university and other institutions to prove the healing capabilities of psilocybin which is found in Golden Teacher mushrooms. There’s strong evidence that psilocybin mushrooms can help PTSD, anxiety and depression sufferers.
If you decide to consume these mushrooms, keep in mind that many people report having the single most spiritual experience of thier lives.
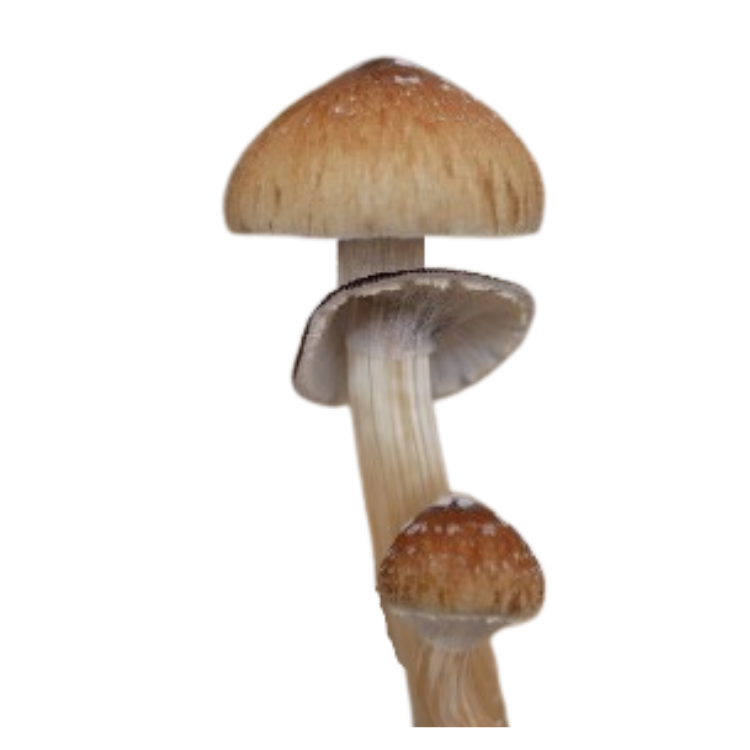
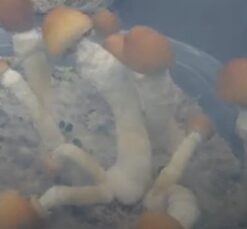
Golden Teacher is a species of Psilocybe cubensis. When you grow this strain, you will notice thick white stems erupt from the surface, brandishing small caps that resemble a, well, a penis. A blue-colored bruising forms when you touch the body of the mushroom, this is an indication that it’s “active” (has psilocybin present). All psilocybin strains will bruise when touched before they’re dried.
Table of Contents
What Are the Benefits of Growing Your Own Penis Envy Mushrooms?
1. A steady supply of mushrooms for personal use and micro dosing
2. Knowing exactly where the mushrooms came from and what they were grown on.
3. Saving money compared to buying mushrooms from a “grower”
4. Having the satisfaction of knowing that you grew them yourself
5. Once you learn to grow these, it’s not hard to transition to Pink Oyster, or Lions Mane.
6. You get to pick what strain you want to grow.
What is the Most Important Part of Growing?
Keeping your culture (spores, or myceium) clean and away from competing contamination.
When it comes to mycelium and spores, there is one big rule of thumb: keep them away from contaminants!
In nature, mycelium doesn’t usually have to worry about a person breathing and getting bacteria all over them. When we grow indoors we can get bacteria from our mouths, or our body in the culture we are working on and the culture is doomed.
There are two main types of contaminants that you need to worry about: other fungi and bacteria. Both of these can quickly overtake your mycelium and spores, leading to a loss of your entire culture.
Bacteria are especially dangerous as they can reproduce much faster than fungi. This means that they can quickly take over a culture if left unchecked.
To prevent this from happening, it is important to sterilize all of your equipment before use.
You can do this by boiling all of your tools in water for at least 10 minutes. This will kill any bacteria or other contaminants that may be present.
In addition to sterilizing your equipment, you should also work in a clean environment. Make sure that your work area is free of dust and other particles that could contaminate your culture.
By following these simple steps, you can help prevent the spread of bacteria and other contaminants when working with mushroom cultures.
How Stop Contamination...
When mycologist work with cultures they work in a clean room that has positive pressure and all the air flowing into the room goes through a laminar flow hood.
These flow hoods have HEPA filters installed that clean the air of 99.997% of particulates. We won’t get into the weeds here but if you can duplicate this environment you will almost certainly be successful in growing Golden Teacher Mushrooms, or any psilocybin mushroom for that matter.
What is a Laminar Flow Hood
Most beginners don’t use laminar flow hoods because they’re expensive. Most people start out using a SAB (Still Air Box). These are an acceptable alternative but are not very good at keeping contam out of your culture.
I’ve personally had terrible luck with them and found this flow hood, which is quite small and easy to move around. Its large enough to grow your mushroom hobby into a larger operation and it’s small enough that it can hug a wall and be out of the way. Check it out here…
To Buy a Kit Or Not?
There’s more than one way to skin a cat when it comes to growing. You can buy a an “all in one grow bag”, you can buy a “grow kit” or you can grow your own from start to finish.
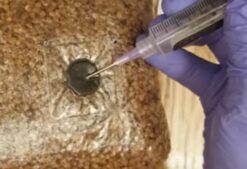
All in one grow bags – which has all of your growing materials in one bag. All you have to do is buy your own spore syringe or liquid culture and inject them it into an injection port on the bag. There’s no need to learn any of the “teks” or techniques for growing, you just inject your spores and wait. If you use all in one bags, you want a reputable vendor. You want your bags freshly packaged and sterilized so they’re not sitting around for too long. The longer they sit the more contamination has an opportunity to intrude.
The Pros: This is the easiest route, not a lot to learn, not much to do, not many mistakes that you can make.
The Cons: They’re expensive, often around $300. You have no idea how much you’re going to get from your grow. You might get good results, or your bag could stall out and nothing ever happens…and you’ve wasted your money.
Grow Kits which have everything you need to grow included. They’re often $300-$450 and above. You get everything you need to grow your own in one kit.
The Pros: You have everything you need in one place. You don’t have to do any other shopping and you don’t have to spend hours and hours on YouTube trying to understand which tek you should use to grow Penis Envy Mushrooms.
The Cons: You often end up spending more on a kit then you’d spend if you purchased everything yourself from amazon. You have to continue to buy supplies for future grows. The steps you’re saving by purchasing materials from a third party are actually pretty easy.
Here's How To Grow Golden Teacher Mushrooms...
There is a best practices way to do things and a “good enough” way to do things. I’ll cover best practices and give honorable mention to the good enough practices.
Start with spores...
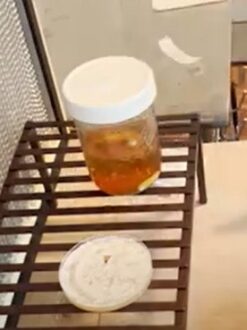
You need a good spore or liquid culture supplier. If you prefer not to pay with bitcoin for your spores you can use this supplier. You can use either one. The big difference between the two is longevity. Liquid culture has a shelf life of around a year, it could last longer, and it can be fed more “food” so the mycelium can grow longer in it’s honey water.

Spores to Agar Agar
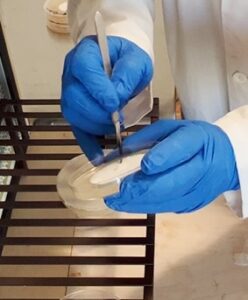
You will want to either buy pre poured agar plates or make the agar and pour it onto petri dishes yourself.
If you want pre poured agar plates click here.
Click here to watch a video on how to make your own agar agar. The video descriptions has links to all needed equipment.
Shortcut Alert....
You can skip growing your mycelium out on agar if you want to TRY to speed up the process. You could end up with slow growing spores that ultimately take longer to produce fruits than if you used agar. To do so, you take your spore syringe and inject the spores directly into the sterile grain. If you opt to go this route, then skip to Grain Prep.

Agar Transfers
Now that you’ve got your spores on agar and they’ve turned into mycelium, it’s time to transfer the best genetics to continue to grow and mature on a new agar plate. You will need to repeat this process until your mycelium is filling 3/4 of the plate in about 7 days. Sometimes this takes 3-4 transfers, and other times it takes 4-6 transfers. Be patient, it’s worth it. To see how to transfer mycelium from agar plate to agar plate, go here
Side Note before Making Liquid Culture
Some growers avoid Liquid culture for one reason or another. I’ve found LC to be very effective at speeding up colonization times of grain. The mycelium can stay alive for long periods of time in liquid culture form so its easy to store and a small amount of LC can inoculate many jars of grain.
Shortcut Alert...
You can skip making LC. Instead you can take your agar plate and cut it into pieces and drop it directly onto your sterile grain. This typically takes longer to colonize than using LC because there are less contact points. LC produces millions of small contact points that grow in all directions at the same time. Your agar wedges will not have as many contact points and therefore will take longer to colonize.

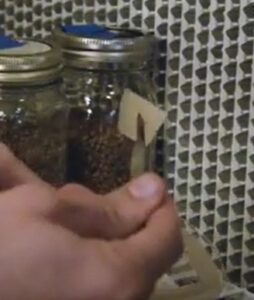
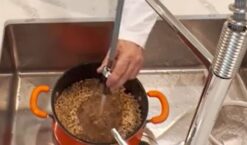
Grain Prep and Sterilizing
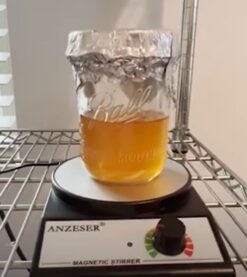
Now your mycelium is on Liquid culture and has started to fill the honey water mixture with lots of tiny pieces of mycelium, you will need the next medium or nutrient to grow your myc out on.
Over the next 14-21 days the mycelium will become more mature and grow its own immune system as it colonizes and absorbs/eats the nutrients of the grain we going to prepare next.
Go here and follow the step by step instructions from this video. All needed materials and equipment are linked in the vid.
Inoculating Grain With Liquid Culture
Your Liquid culture is ready to meet its next meal… The grain spawn is sterile…
Now we inoculate the sterile grain with Liquid culture. Go here to see the process.

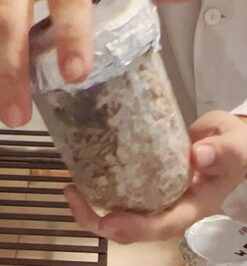
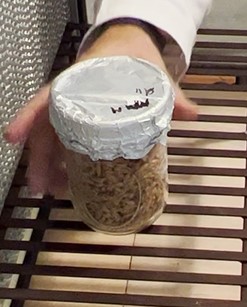
Shake - Shake the Grain
When you see your grain jar is about 30% colonized you can shake the grain up so the mycelium can be respread into the uncolonized grain. To do this just pick up the jar, do not remove the lid or foil and shake the grain until it is not longer clumped together. Manipulate the jar so the white pieces of mycelium spread all over the grain jar. By shaking the jar you create a bunch of pieces of my growing in all directions that will help them increase their colonization time. You will shake the jars when they are 30% colonized and shake them again when they are 70% colonized. Your grain should be fully colonized in 14-21 days.
For more on how and when to shake your grain go here
Make a Bulk Substrate For Your Fully Colonized Grain
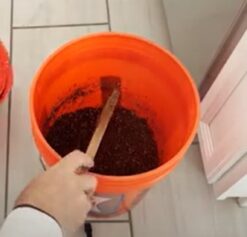
There are some different types of substrates you can make. I’ve always liked using coco coir as it is easy to use for beginners and only requires pasteurizing. For the sake of this article we will only cover how to do coco coir.
Now that the grain is fully colonized we need a bulk substrate to feed our mycelium in this final step before it will produce mushrooms.
Go here to see how to make a coco coir substrate and to see a material and equipment list. Note, that the recipe used in the video is for a 30 quart monotub. If you’re using a 60 quart monotub you will need to double the recipe. It’s very important that you get the right amount of water in your substrate. You are looking for the substrate to be at field capacity. This means there’s plenty of water for the mycelium to drink while it’s colonizing. No short cuts here, or it could stall your entire grow.
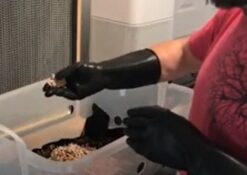
Inoculate Bulk Substrate in Monotub
A monotub is a usually made up from 30 quart tubs or 60 quart tubs. If you’re using a 54 or 56 quart tub you will be fine. The main function of the monotub is to provide the mycelium a small eco dome that gives them the CO2, and fresh air exchange it needs to produce mushrooms.
GO HERE to learn how to Make a Monotub
GO HERE to see the step by step instructions for filling (inoculating) a monotub.
Now Wait...and Wait
Expect full colonization to happen in 2-3 weeks and harvest in another 7 days after first pins show up.
For this reason, be patient. The first pins might be sparse or might be amazing clusters, it’s a matter of genetics and if you picked fast strong gentics to transfer. They’re a favorite among psychonauts.


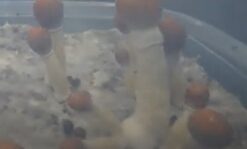
Time to Harvest
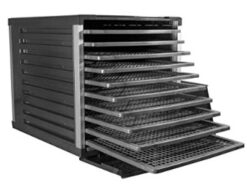
Once the veil breaks (it’s sometimes hard to see on Penis Envy) you will want to pick your fruits and either eat them fresh within a day or two. Or you can dehydrate them until they are cracker dry and store them somewhere dry and out of direct sunlight. If you do this correctly your mushrooms will stay potent for a year or longer.
I use THIS dehydrator and I run it at 140 degrees for 12-14 hours. You can choose a lower temp if you prefer, but this is the temp I personally use.
Complete Video Series: Grow Mushrooms Start to Finish
Click on the video below (how to make agar) this is step one in growing your own mushrooms. Follow the rest of the videos in order. All materials needed are in this blog and also listed the description of each video.
Equipment list
Here is my equipment list orgainized into the various teks. If you’re making agar, all the equipment needed is under “making agar”.
Making Agar
| Kitchen Scale | https://amzn.to/3Yzgvp8 |
| Spoon | https://amzn.to/3WtZ1bX |
| Agar Agar | https://amzn.to/3Vq0pf3 |
| Yeast Extract | https://amzn.to/3G3Inuo |
| Dry Malt Extract | https://amzn.to/3jktWck |
| Glass bottle for pressure cooking | https://amzn.to/3FFFIG2 |
| Pressure Cooker 4 Quart | https://amzn.to/3HT7CkF |
| Pressure Cooker 23 Qt | https://amzn.to/3HO8PJZ |
| Plastic bowls for raw materials | https://amzn.to/3hBnpd3 |
| Measuring Cup | https://amzn.to/3PDtv98 |
| Thermo temp gun | https://amzn.to/3YCB9EO |
| Still Air Box | https://amzn.to/3Wy4sH5 |
| Laminar Flow Hood | https://amzn.to/3YViyEh |
| Parfilm Tape | https://amzn.to/3YzqUBm |
| Gloves | https://amzn.to/3WxuJ87 |
| Petri Dishes | https://amzn.to/3Wy4L4H |
Spores to Agar
| Petri Dishes | https://amzn.to/3Wy4L4H |
| Spore Suringe | https://www.sporestore.com/?ref=9278 |
| Pen | https://amzn.to/3hEmuZm |
| Parafilm Tape | https://amzn.to/3YzqUBm |
| Sterilizer | https://amzn.to/3hCbPOG |
| Paper Towels | https://amzn.to/3YDoEc8 |
| Gloves | https://amzn.to/3WxuJ87 |
| Alcohol |
Agar to Agar Transfers
| Petri Dishes | https://amzn.to/3Wy4L4H |
| Scalpel | https://amzn.to/3YNxyUT |
| Gloves | https://amzn.to/3WxuJ87 |
| Parafilm Tape | https://amzn.to/3YzqUBm |
| Sterilizer | https://amzn.to/3hCbPOG |
| Alcohol | https://amzn.to/3WqC9du |
Making Liquid Culture
| Glass jar/Container to pressure cook | https://amzn.to/3BQQUOP |
| Measuring Spoon | https://amzn.to/3PDtv98 |
| Measuring Cup | https://amzn.to/3PDtv98 |
| Pressure Cooker 23 Qt | https://amzn.to/3HO8PJZ |
| Stirrer | https://amzn.to/3v3FbIR |
| Stir magnet | https://amzn.to/3G1FxpR |
| Tinfoil | https://amzn.to/3hwQLJG |
| Poly Fil | https://amzn.to/3VfP2G5 |
| Water | Home |
| Honey | https://amzn.to/3G61fZZ |
Grain Prep
| Cullender | https://amzn.to/3PG7Xca |
| Bucket | https://amzn.to/3PG7Xca |
| Measuring Cup | https://amzn.to/3PDtv98 |
| Pot to boil or let sit in container over night | https://amzn.to/3W8vy7G |
| Jars to pressure cook | https://amzn.to/3W90nsR |
| Pressure Cooker 23 Qt | https://amzn.to/3HO8PJZ |
| Tinfoil | https://amzn.to/3hwQLJG |
| Poly Fil |
Inoculating Grain
| Liquid Culture or Agar | Covered |
| Scalpel | https://amzn.to/3YNxyUT |
| Pipettes | With Petri Dish |
| Laminar Flow Hood | https://amzn.to/3YViyEh |
| Still Air Box | https://amzn.to/3Wy4sH5 |
| Sterilized Grain | Home |
| Gloves | https://amzn.to/3WxuJ87 |
| Mask |
Making Bulk Substrate
| Bucket | https://amzn.to/3PG7Xca |
| Measuring Cup | https://amzn.to/3PDtv98 |
| Kitchen Scale | https://amzn.to/3Yzgvp8 |
| Pot to boil or let sit in container over night | https://amzn.to/3W8vy7G |
| Vermiculite | https://amzn.to/3PDxDWG |
| Coco Coir | https://amzn.to/3WeBI6u |
Making Monotub
| Drill | https://amzn.to/3G4iZU3 |
| Hole drill 1 1/4 inches | https://amzn.to/3CfzFqO |
| Plastic Tub ~60 quarts | https://amzn.to/3Q2DMvU |
| Tape Measure | https://amzn.to/3GrYXEq |
| Razor Blade | https://amzn.to/3GqehAv |
| Poly-fil | https://amzn.to/3WcFEV4 |
| Microspore Tape | https://amzn.to/3WWTbQA |
Making a Liner for Monotub
| Scotch Tape | https://amzn.to/3vvJtZX |
| Scissors | https://amzn.to/3VBAbpZ |
| Plastic Bag | https://amzn.to/3VBAbpZ |
Monotub Prep Inoculating Monotub
| Alcohol | https://amzn.to/3WqC9du |
| Paper Towels | https://amzn.to/3YDoEc8 |
| Poly-fil | https://amzn.to/3WcFEV4 |
| Gloves | https://amzn.to/3WxuJ87 |
| Mask | https://amzn.to/3PC84FD |
| Spoon | https://amzn.to/3WtZ1bX |
Dehydrators
| Small Dehydrator | https://amzn.to/3G6HVud |
| Large Dehydrator | https://amzn.to/3VQ0NUl |